Teeth Measurement
The Problem
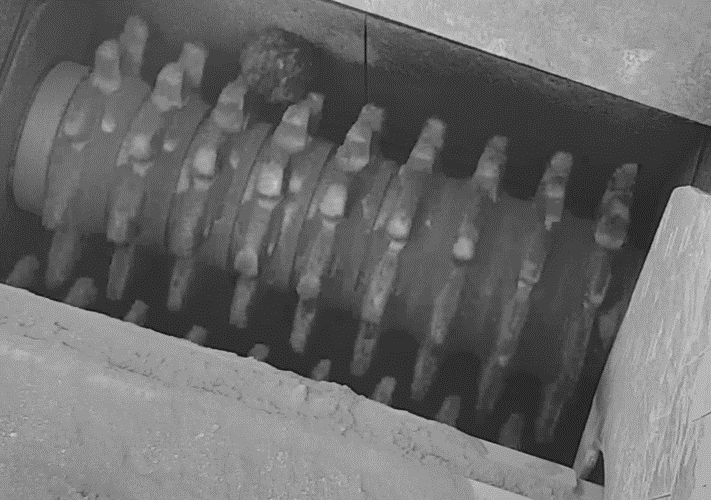
The teeth on rock crushers wear over time, and must be replaced. Replacing them too soon is costly. Waiting too long creates incorrectly sized rocks, which is costly for downstream processing.
The traditional way of ensuring the optimal use of the crusher is to periodically suspend the crushing operations and measure the teeth with a 3D scanner. This adds downtime and requires specialised equipment, so is there a better way?
The Data
The data provided to Cyency consisted of time stamped video feeds from the existing cameras used to monitor the crusher operations. These videos varied in quality due to different crushers, lighting, time of day, angles, cropping, focus and resolution. A set of weekly tooth length measurements was also provided to act as reference lengths.
The cameras were not calibrated and could be manually zoomed, making absolute measurements more difficult.
The Solution
With only a relatively small number of reference lengths and a large variation in input images, an end-to-end deep learning solution seemed difficult and susceptible to variations not seen in the training set. So a hybrid solution was used to break the problem into a series of steps, each of which could be verified to be relatively robust.
Before any neural nets could be trained, a set of annotated images was required. Cyency can easily generate tools for efficient annotating and so could quickly generate a sufficient number of annotations.
The algorithm runs as follows:
-
Scanning – the video sequence is scanned for sequences where the sizer can be seen rotating. If the sizer isn’t rotating, then the algorithm can’t be sure that it is measuring the longest part of the teeth. If the teeth are obscured by the ore feed, then good results are not possible. Even given these constraints, several usable sequences are generally found in a given hour.
-
Initial orientation and scale calculation. A light-weight neural net is used to determine the normalisation parameters required to orient the input frame into a standard view.
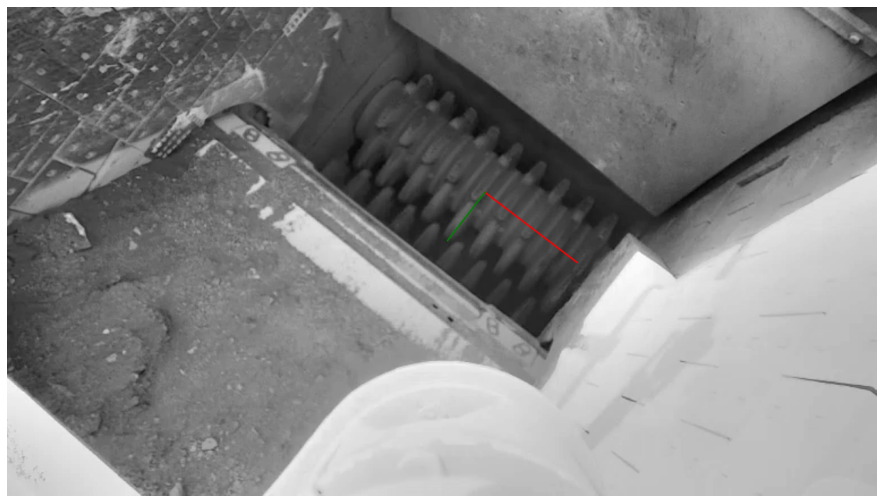
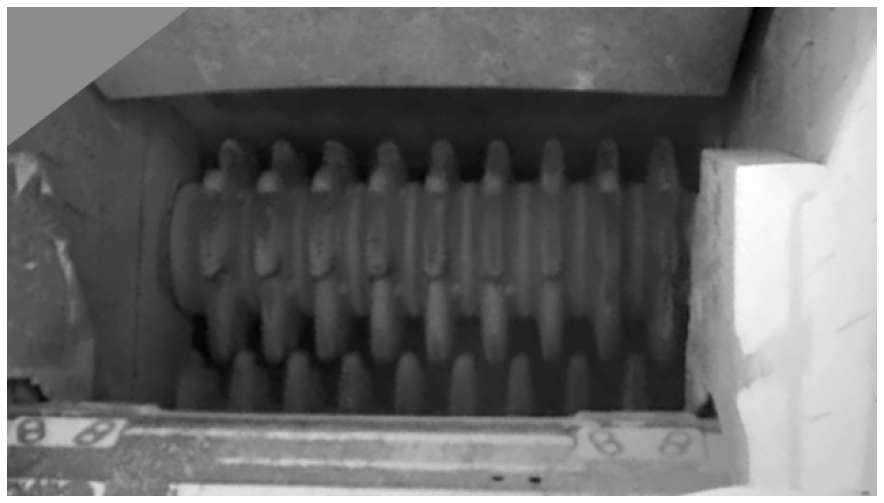
- Teeth-line detection. A second neural net is then run over the normalised image to identify the lines running from tooth-tip to tooth-tip.
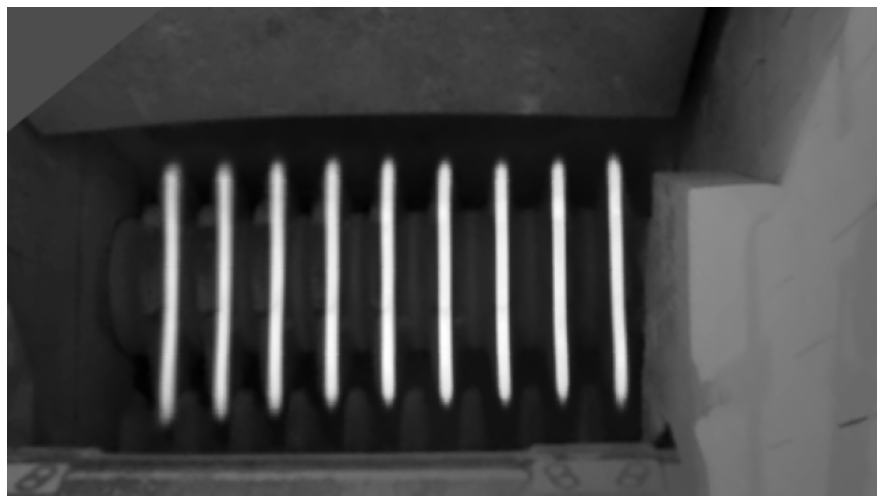
- Position refinement. The generated teeth-lines are slightly fuzzy and the normalised image resolution is not very high, so being off by a pixel two could create an error of a few millimetres. To improve accuracy, a final network is run in high resolution to identify the tooth tips with sub-pixel accuracy.

- Conversion to calibrated measurement. Since the cameras are not calibrated, the image and camera parameters must be estimated from the teeth positions. Once these parameters have been recovered, absolute lengths can be calculated and logged for later use.
The system is very fast. With a consumer-grade GPU, the process can be run at better than 5x realtime. That is, it can continually process more than 5 video feeds on a single machine. It can also run on a CPU based virtual server if required.
The Results
The delivered camera-based solution was run in parallel with the existing survey system for several months, and the results compared.
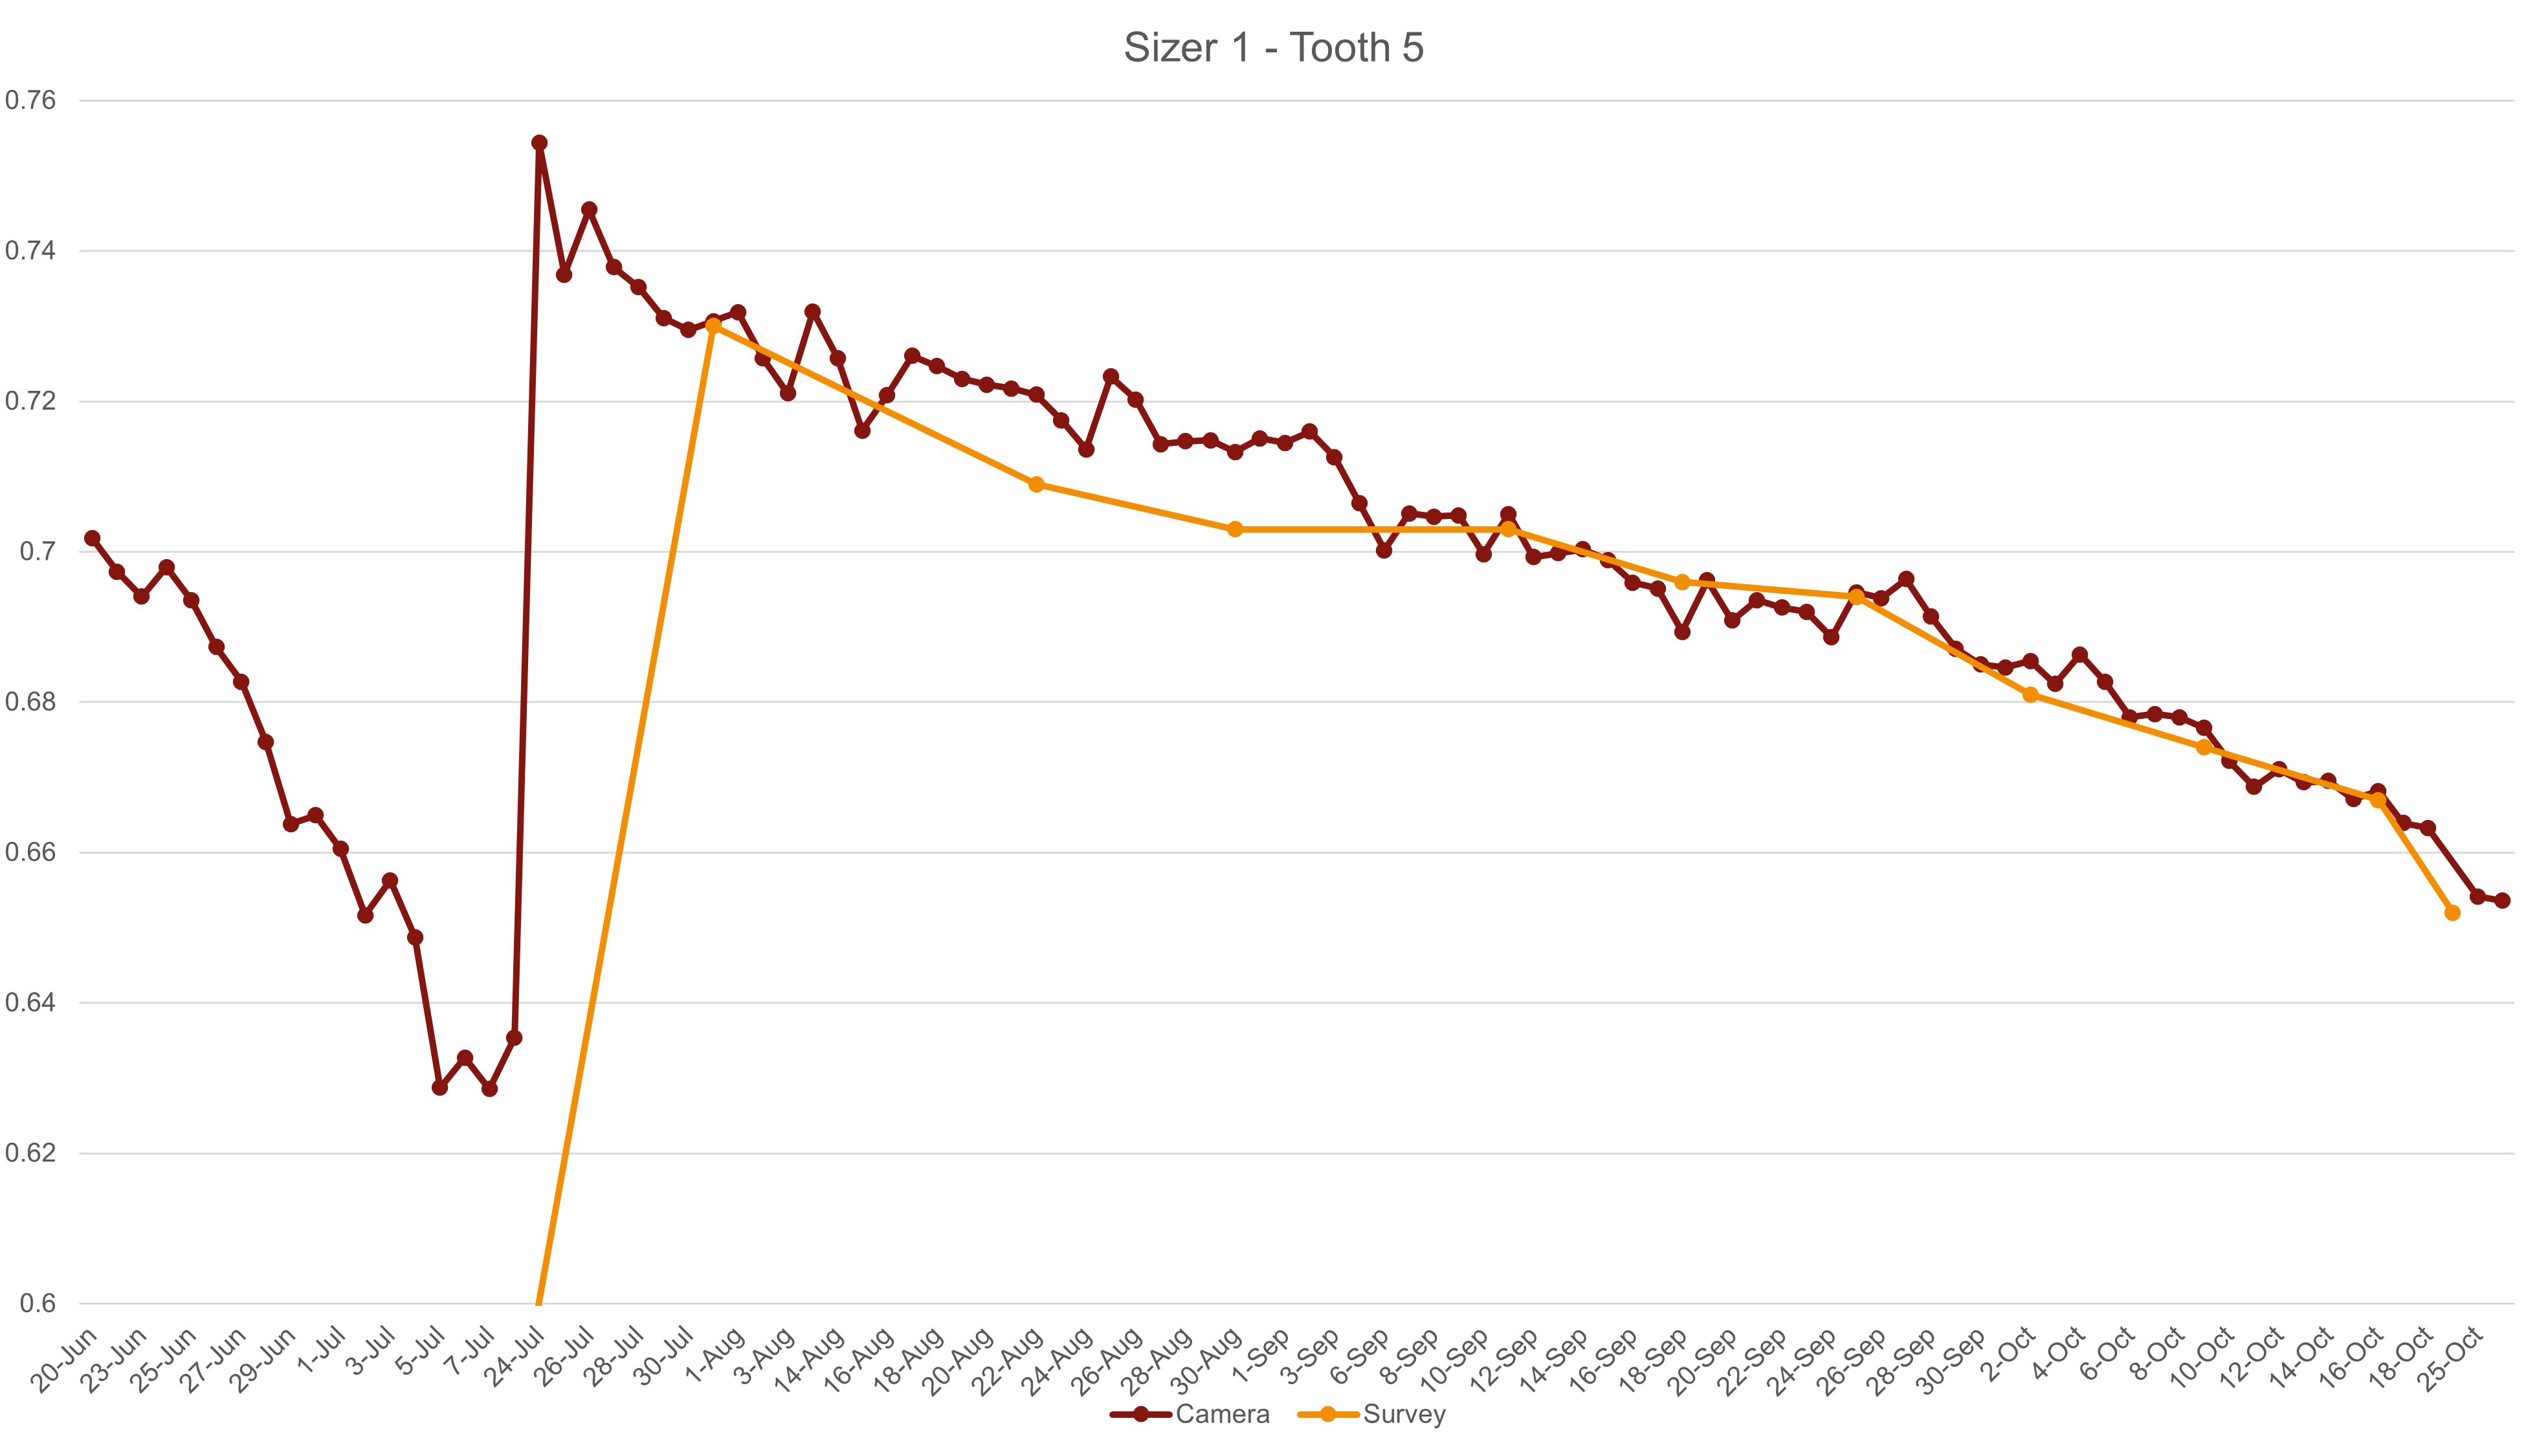
The results show very good agreement with traditional measurement techniques. In addition, the results can be generated more frequently and do not require the crusher to be shut down or cleaned.
The Bottom Line
A practical, robust solution was delivered in a timely manner that should show a great return on investment.
If you have a process you think could be better managed with computer vision, please contact Cyency , we would love to hear!

